- Published on
- |- 次浏览
UE4使用第三方静态库和动态库
- Authors

- Name
- 东哥
前言
本文介绍一下UE4使用第三方库的简单用法, 即DLL动态库和Lib静态库的使用
我们用插件的形式封装起来, 便于以后移植到其他项目中去;
所以在开始之前先新建一个空或者蓝图库插件
导出动态/静态库
新建控制台应用程序ThirdPartyDLL
然后创建一个同名头文件,写入一下内容
#pragma once

#define DLL_EXPORT __declspec(dllexport)	//shortens __declspec(dllexport) to DLL_EXPORT
#ifdef __cplusplus		//if C++ is used convert it to C to prevent C++'s name mangling of method names
extern "C"
{
#endif

	int DLL_EXPORT GetMac(char * mac);

#ifdef __cplusplus
}
#endif
因为要确保函数名称我们用C的方式编译即extern "C"
实现
#pragma once

#include "string.h"
#include "ThirdPartyDLL.h"


#include <windows.h>
#include <wincon.h>
#include <stdlib.h>
#include <stdio.h>
#include <time.h>
#include <Nb30.h>
#pragma comment(lib,"netapi32.lib")


int  GetMac(char * mac)
{
	NCB ncb;
	typedef struct _ASTAT_
	{
		ADAPTER_STATUS   adapt;
		NAME_BUFFER   NameBuff[30];
	}ASTAT, *PASTAT;

	ASTAT Adapter;

	typedef struct _LANA_ENUM
	{
		UCHAR   length;
		UCHAR   lana[MAX_LANA];
	}LANA_ENUM;

	LANA_ENUM lana_enum;
	UCHAR uRetCode;
	memset(&ncb, 0, sizeof(ncb));
	memset(&lana_enum, 0, sizeof(lana_enum));
	ncb.ncb_command = NCBENUM;
	ncb.ncb_buffer = (unsigned char *)&lana_enum;
	ncb.ncb_length = sizeof(LANA_ENUM);
	uRetCode = Netbios(&ncb);

	if (uRetCode != NRC_GOODRET)
		return uRetCode;

	for (int lana = 0; lana < lana_enum.length; lana++)
	{
		ncb.ncb_command = NCBRESET;
		ncb.ncb_lana_num = lana_enum.lana[lana];
		uRetCode = Netbios(&ncb);
		if (uRetCode == NRC_GOODRET)
			break;
	}

	if (uRetCode != NRC_GOODRET)
		return uRetCode;

	memset(&ncb, 0, sizeof(ncb));
	ncb.ncb_command = NCBASTAT;
	ncb.ncb_lana_num = lana_enum.lana[0];
	strcpy((char*)ncb.ncb_callname, "*");
	ncb.ncb_buffer = (unsigned char *)&Adapter;
	ncb.ncb_length = sizeof(Adapter);
	uRetCode = Netbios(&ncb);

	if (uRetCode != NRC_GOODRET)
		return uRetCode;

	sprintf(mac, "%02X-%02X-%02X-%02X-%02X-%02X",
		Adapter.adapt.adapter_address[0],
		Adapter.adapt.adapter_address[1],
		Adapter.adapt.adapter_address[2],
		Adapter.adapt.adapter_address[3],
		Adapter.adapt.adapter_address[4],
		Adapter.adapt.adapter_address[5]);

	return 0;
}


int main()
{

	char   mac[200];
	GetMac(mac);
	printf("The Mac Address is : %s   \n", mac);

	system("pause");


	return 0;
}
上述内容目的是获取本地的mac地址, 不用理会具体实现方法, 我们主要是拿来当作第三方库使用, 毕竟UE4现在自己的API没有可以拿到Mac地址的;
设置模式为 Release+x64
在vs中简单运行一下得到结果
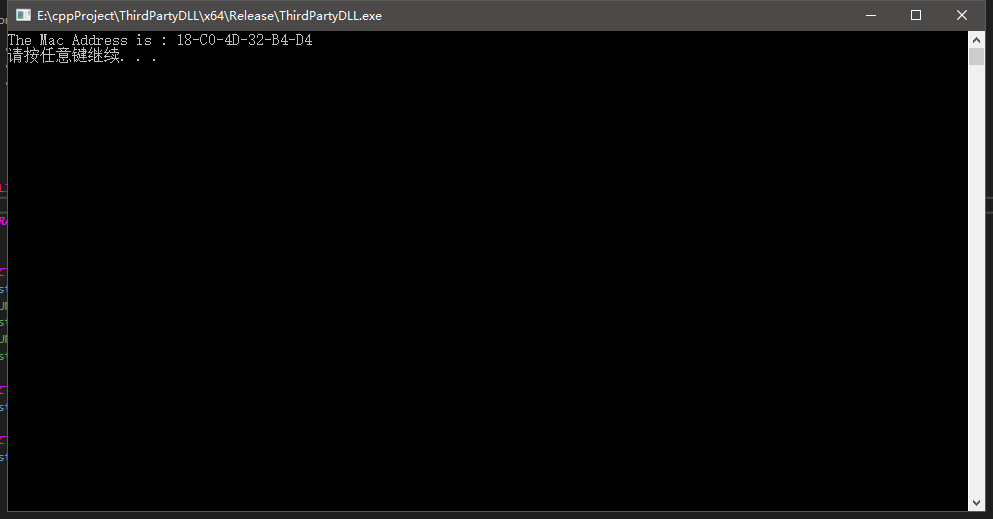
运行正常, 然后是导出我们所需要的动态库
在项目属性里设置配置类型为DLL,如下

生成以后就得到了我们需要的DLL文件
静态库只需要在项目配置里修改成Lib,然后再生成一次即可
UE4封装函数库
静态方法
先到插件目录下,在source同级目录下新建文件夹ThirdParty,然后分别创建子文件夹DLL,Include,Lib,如下
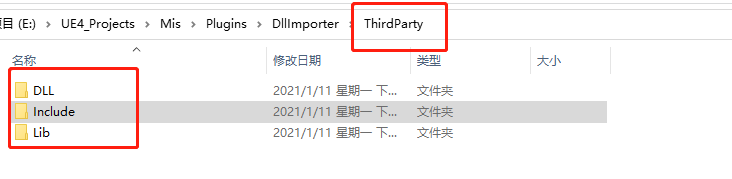
分别放入的文件为ThirdPartyDLL.dll,ThirdPartyDLL.h,ThirdPartyDLL.lib
然后来到我们的插件模块,找到*.build.cs文件,添加必要路径
//using System.IO;

private string ModulePath
    {
        get { return ModuleDirectory; }//return
    }
    private string ThirdPartyPath
    {
        get { return Path.GetFullPath(Path.Combine(ModulePath, "../../ThirdParty/")); }
    }


 PublicIncludePaths.Add(Path.Combine(ThirdPartyPath, "Include"));
        PublicAdditionalLibraries.Add(Path.Combine(ThirdPartyPath, "Lib", "ThirdPartyDLL.lib"));
这样我们就可以在自己的cpp中包含静态库的头文件了
找到/创建蓝图函数库
头文件下声明如下函数
UFUNCTION(BlueprintCallable, BlueprintPure ,Category = "Flib|DllHelper", meta = (DisplayName = "GetMac"))
		static FString GetMacFromLib();
然后实现
#include "ThirdPartyDLL.h"
FString UFlib_DllHelper::GetMacFromLib()
{
	char   mac[200];
	GetMac(mac);
	FString out = FString(mac);
	return out;

}
运行测试
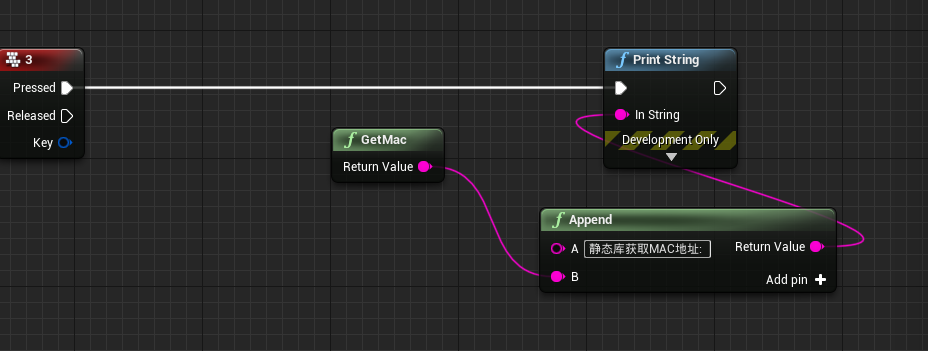

运行正常,打包以后也正常
动态方法
动态获取DLL, 我们可以直接在函数库中使用
UFUNCTION(BlueprintCallable, BlueprintPure, Category = "Flib|DllHelper", meta = (DisplayName = "GetMacDLL"))
		static FString GetMacFromDLL();
typedef int(*_getMac)(char * mac);
_getMac funcGetMac; //函数指针

void *v_dllHandle; //DLL句柄

FString UFlib_DllHelper::GetMacFromDLL()
{
    //我们基于插件目录找到DLL文件
	FString folder ="DllImporter//ThirdParty//DLL";
	FString file = "ThirdPartyDLL.dll";
	FString filePath = *FPaths::ProjectPluginsDir() + folder + "/" + file;

	if (FPaths::FileExists(filePath))
	{
		v_dllHandle = FPlatformProcess::GetDllHandle(*filePath);

		if (v_dllHandle != nullptr)
		{
			funcGetMac = nullptr;
			FString procName = "GetMac";
			funcGetMac = (_getMac)FPlatformProcess::GetDllExport(v_dllHandle, *procName);
			if (funcGetMac != nullptr)
			{
				int idx = 0;
				char   mac[200];
				idx = int(funcGetMac(mac));
				return FString(mac);
			}
		}
	}
	return TEXT("");
}

但是如果只是这样的话, 编辑器模式下没有问题, 打包以后会找不到DLL文件
解决方法是在*.build.cs内对动态库添加包含
PublicLibraryPaths.Add(Path.Combine(ThirdPartyPath, "DLL"));
RuntimeDependencies.Add(new RuntimeDependency(Path.Combine(ThirdPartyPath, "DLL","ThirdPartyDLL.dll")));
成功
另外还有一种情况, DLL导出库是Lib的链接, 在编辑器下没有问题, 但是打包以后会提示招不到DLL
但是DLL是在你所在模块插件的目录里, 你需要手动复制到项目Binaries里去,或者用如下的方式自动拷贝并添加动态依赖
string BinariesDirectory = Path.Combine(ProjectDirectory, "Binaries", PlatformString);
			string SourceFile = Path.Combine(ThirdPartyPath, "assimp/bin", PlatformString, "assimp-vc140-mt.dll");
			string TargetFile = Path.Combine(BinariesDirectory, "assimp-vc140-mt.dll");
			if (!Directory.Exists(BinariesDirectory))
            {
				Directory.CreateDirectory(BinariesDirectory);
            }
			if(File.Exists(SourceFile) && !File.Exists(TargetFile))
            {
				File.Copy(SourceFile, TargetFile, false);
            }

			RuntimeDependencies.Add(Path.Combine(BinariesDirectory, "assimp-vc140-mt.dll"));
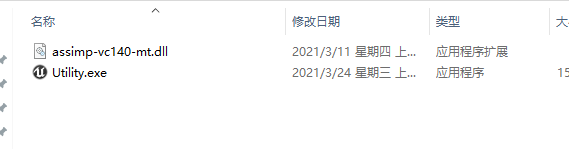
如上图打包以后就放到了正确的目录