- Published on
- |- 次浏览
MaxScript学习笔记
- Authors

- Name
- 东哥
前言
MaxScript学习笔记
搬运至遥远的2019年
默认启动
\AppData\Local\Autodesk\3dsMax\2018 - 64bit\CHS\scripts\startup
把ms文件放到启动文件夹下,启动max就启动脚本
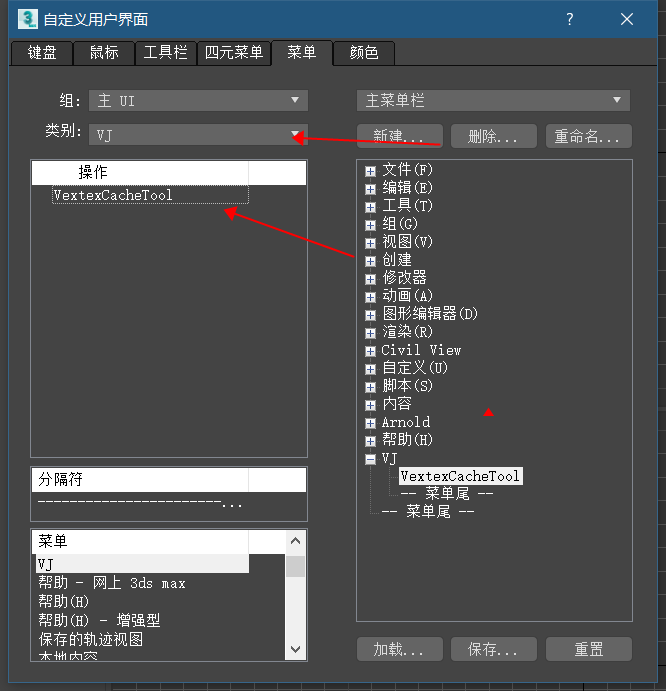
快捷添加
- 用下面代码包裹一个ms代码,存为类型mcr格式
- 放到路径
\AppData\Local\Autodesk\3dsMax\2018 - 64bit\CHS\usermacros,重新启动max - 或者直接在编辑器模式下运行宏命令会直接添加到路径
macroScript VextexCacheTool   --具体类别里的名称
        category:"VJ"    --显示的类别
        toolTip:""
	(
    -- 把ms脚本粘贴进来
    )
语法记录
创建
mybox=box()
$Box:Box001 @ [0.000000,0.000000,0.000000]
mybox.lengthsegs=20
20
mybox.heightsegs=10
10
addModifier mybox (twist angle:30)
OK
mybox.twist.angle=99
99
mybox.twist.offset=10
10
addModifier mybox (spherify percent:50)
OK
mybox.spherify.percent=100
100
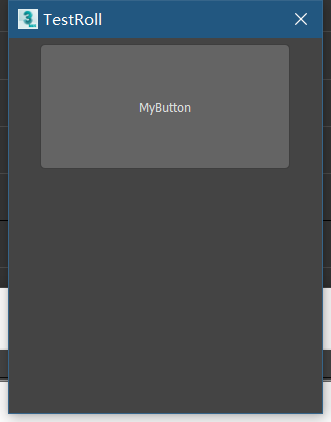
窗口
- 独立单一窗口
try destroyDialog ::TestRoll catch() --关闭已有窗口
rollout TestRoll "TestRoll"
(
    button myBtn "MyButton" width:200 height:100

)
CreateDialog TestRoll width:250 height:300
效果
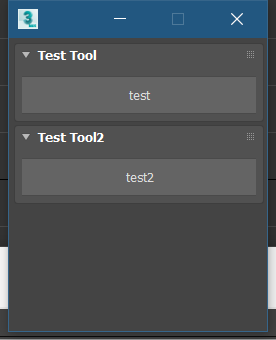
- 多个rollout
  global Morph_Floater = newRolloutFloater "" 200 230


rollout tt "Test Tool"
(
	button bt2 "test" height:30 width:200

)
addRollout tt Morph_Floater

rollout tt2 "Test Tool2"
(
	button bt2 "test2" height:30 width:200

)
addRollout tt2 Morph_Floater
效果
button
- 设置图片
button BakeBtn "开始烘培" height:80 width:250 images:#(GetDir #maxSysIcons+"\CAT_CATMode_a.bmp", undefined, 1,1,1,1,1 ) iconSize:[200,80]
$
- 一般用法是指选中的物体,比如
$.name --选中物体的名字
#.height	--选中物体的高度
- 特定物体
$box01.height=10 --把名称为box01的物体的高度设置为10
动画
mybox =box()
animate on
(
  at time 0 (mybox.pos = [-100, 0, 0]; mybox.scale = [1, 1, 0.25])
  at time 100 (mybox.pos = [100, 0, 0]; mybox.scale = [1, 1, 3])
)--设置动画
playanimation()--播放
if
if mybox.height == 10
then mybox.width = 20
else mybox.width = 10

mybox.width = if mybox.height == 10 then 20 else 10   --类似C++ 的 ?:
==
== --equal to

!= --not equal to

> --greater than

>= --greater than or equal to

< --less than

<= --less than or equal to
for
 for var = value to array.count by -1 where (condition) do (

)
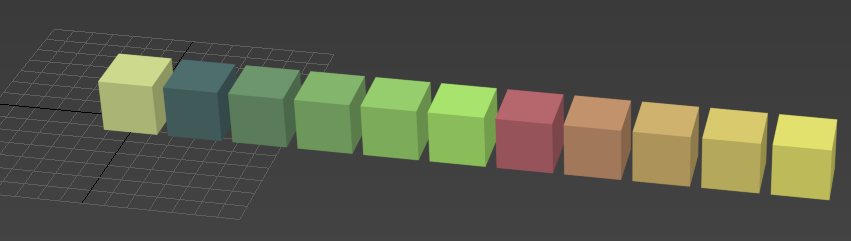
- 创建一堆box
mybox =box()
for i = 1 to 10 do (
    copy_box=copy mybox
    copy_box.pos=[i*30,0,0]
    copy_box.wirecolor=[i*25,i*50,50]
)
数组
arr = for i =1 to 5 collect i
--#(1, 2, 3, 4, 5)
arr2=#(1,2,3,555,44)
--#(1, 2, 3, 555, 44)
a = #()--空数组
a = #(1,2,3)
joint a #(4,5,6)-- a数组加入4,5,6
a.count --数量
c=($box* as Array)+($Sphere* as Array) --把所有box和spehre名称的作为数组并且相加
append c ($Cone* as Array) --把所有Cone作为数组成员添加到c
while
x=10
10
while x>0 do print(x-=1)
9
8
7
6
5
4
3
2
1
0
0
函数
fn fun1 v:0=(
if v==0 then print "good"
else if v>0 then messagebox ("greater than 0")
else messagebox ("too low")
)

fun1 v:-9
结构体
Struct person (name,sex,age)
joe=person name:"helo" sex:#male age:20
print(joe.name)
max命令
max file ? --显示file下面的命令
max file open -- 打开文件
脚本:批量重命名
macroScript RenameThem   --运行以后生成宏,可以放到快捷方式上
    category:"HowTo"
    ButtonText:"RenameThem"
    toolTip:"Rename"

(

    rollout rename_rollout "Enter New Base Name"
    (
        edittext base_name ""
        button rename_them "RENAME"
        On rename_them pressed do
        (
            if base_name.text!="" do (
                for i in selection do i.name=uniquename base_name.text  --uniquename保证不重名
            )
        )
    )
    CreateDialog rename_rollout 250 50
)
脚本:批量选择偶数面
rollout TestRoll "TestRoll"
(
    button myBtn "MyButton" width:200 height:100

    on myBtn Pressed do (
        if selection.count==1 and classOf selection[1].baseobject==Editable_Poly then
            (
                local face_selection=#{}   --选择的面,值为bool
                local base_obj = $.baseobject   --选择的物体转换为baseobject
                local num_faces=polyop.getNumFaces (base_obj) --得到所有面
                print(num_faces)
                for f=1 to num_faces do
                (
                    local isSelect=((mod f 2)==0)  --选择偶数面
                   face_selection[f]=isSelect
                )
                polyop.setFaceSelection base_obj face_selection --设置选择的面
                max modify mode	--改成修改模式
                modPanel.setCurrentObject base_obj	--把物体添加到修改面板里(后续会细讲)
                subobjectlevel = 4  --[[一个3ds Max的系统全局变量,让您获取和设置子对象层级在修改面板,如果它是开放的。

该值是一个零或更大的Integer,直到当前打开的修饰符支持的子对象级别数为止,通常按照“子对象”下拉列表中显示的顺序。

一种 subObjectLevel 为0表示关闭子对象模式。

如果“修改”面板未打开或当前修改器中不允许子对象级别设置,则全局变量包含该值 未定义

                        测试发现>=4才可以实现代码效果
                        ]] --

            )


      else messageBox ("error")

    )
)
CreateDialog TestRoll width:250 height:300
控制菜单是否可以点击
on isEnabled return
(
 selection.count == 1 and classOf selection[1].baseobject == Editable_Poly
)
菜单开启/关闭
macroScript AutoMat category: "HowTo"
(
 local AutoMat_Enabled
 on isChecked return AutoMat_Enabled   --关键这一行
 on Execute do
 (
  if AutoMat_Enabled == undefined then
   AutoMat_Enabled = true
  else
   AutoMat_Enabled = not AutoMat_Enabled
  if AutoMat_Enabled then
  (
   txt ="if superclassof meditmaterials[4] != texturemap do \n"
   txt +="selection.material = meditmaterials[10]"
   callbacks.addscript #selectionSetChanged txt id:#AssignMaterial persistent:false
    Print "set mat"
  )
  else
   callbacks.removescripts id:#AssignMaterial
  updateToolbarButtons()
 )--end Execute
)--end macroScript
脚本:物体移动到自己的表面
macroscript MoveToSurface category: "HowTo"
(
fn g_filter o = superclassof o == Geometryclass
fn find_intersection z_node node_to_z =
(
local testRay = ray node_to_z.pos [0,0,-1] --参见下级目录ray
local nodeMaxZ = z_node.max.z --得到物体的max坐标系的z
testRay.pos.z = nodeMaxZ + 0.0001 * abs nodeMaxZ --修改ray的起始点坐标为物体z加上一点点
intersectRay z_node testRay
)
on isEnabled return selection.count > 0
on Execute do
(
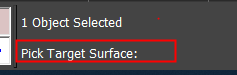
target_mesh = pickObject message:"Pick Target Surface:" filter:g_filter
if isValidNode target_mesh then
(
undo "MoveToSurface" on --注册撤销操作,否则无法撤销
(
for i in selection do
(
int_point = find_intersection target_mesh i
print(int_point)
if int_point != undefined then i.pos = int_point.pos
)--end i loop
)--end undo
)--end if
)--end execute
)--end script
射线变量 ray
local testRay = ray node_to_z.pos [0,0,-1] --射线变量,第一个变量是起点,第二个变量是方向
射线方法 intersectRay
intersectRay z_node testRay
该内置的intersectRay函数被赋予一个节点和一条光线(具有起点和方向的空间矢量),并返回空间中光线照射到节点表面的点;如果没有相交,则返回未定义的点。相交的结果也将是函数的返回值,因为它是最后计算的值。
pickObject
- 原型
pickObject [	message:<string> ] [	prompt:<string> ] \
[	count:n|#multiple ] [	filter:fn ] \
[	select:<boolean> ] [	pickFrozen:<boolean> ] \
[	rubberBand:<point3>] [	rubberBandColor:<color> ] \
[	forceListenerFocus:<boolean> ]
- 案例
target_mesh = pickObject message:"Pick Target Surface:" filter:g_filter
第一个参数用于显示在信息窗口的提示
filter参数传入一个条件函数,案例里用来判断是否是几何体
扩展脚本:移动所有物体的Z坐标与选定物体对齐
macroscript MoveAllGeometryToLand category: "HowTo"
(
fn g_filter o = superclassof o == Geometryclass
fn getZ node_land=
(
    local testray=ray [0,0,-1000] [0,0,1]
    print(intersectRay node_land testray)

)

on isEnabled return selection.count == 1
on Execute do
(
    target_mesh = pickObject message:"Pick Target LandMesh:" filter:g_filter
    if isValidNode target_mesh then
        (
            undo "MoveAllGeometryToLand" on
            (
                for i in geometry where((g_filter i)and i!=target_mesh) do
                    (
                        local point=getZ selection[1]
                        if point!=undefined then i.pos.z=point.pos.z

                    )
                )
            )


)

)--end script
路径定义
脚本:录制并播放动画
macroScript QuickPreview category: "HowTo"
(
 preview_name = (getDir #preview)+"/quickpreview.avi"  --保存的文件路径
 view_size = getViewSize()  --得到视口大小,2位向量
 anim_bmp = bitmap view_size.x view_size.y filename:preview_name  --创建位图
 for t = animationrange.start to animationrange.end do
 (
  sliderTime = t
  dib = gw.getViewportDib()  --得到dib
  copy dib anim_bmp --把dib信息拷贝到bmp位图里
  save anim_bmp --保存位图
 )
 close anim_bmp
 gc()
 ramplayer preview_name ""  --调用raw播放器预览
)
脚本:创建自定义模型
radius1 = 100
radius2 = 10
width = 10

vert_array = #()
face_array = #()

vert_count = 0
num_faces = 10

for a = 0 to (360-(360/num_faces)) by 360/num_faces do
(
v1 = [radius1*cos(a+width),radius1*sin(a+width),0]
v2 = [radius1*cos(a-width),radius1*sin(a-width),0]
v3 = [radius2*cos(a),radius2*sin(a),0]
append vert_array v1   --添加点到数组
append vert_array v2
append vert_array v3

append face_array [vert_count+1,vert_count+3,vert_count+2]
vert_count += 3
)

m = mesh vertices:vert_array faces:face_array
尝试
vert_array=#()
faces_array=#()
h=20
iv=0
num=10
l=100
for i=1 to num do
(

             v1=[l/num*(i-1),0,0]
			 v2=[l/num*i,-h,0]
             v3=[l/num*i,h,0]

            append vert_array v1
            append vert_array v2
			append vert_array v3
            append faces_array [iv+1,iv+2,iv+3]

            iv+=3
            print iv


)

m = mesh vertices:vert_array faces:faces_array

bitmap
- 原型 文档
bitmap <width <height> [filename:<filename_string>] \
[numframes:<integer>] \
[color:<color>] \
[gamma:<float>] \
[pixelAspect:<float>] \
[channels:<channel_name array>]\
[hdr:<bool>] \
[iconName:<filename>]\
[iconSize:<point2>]
- 示例
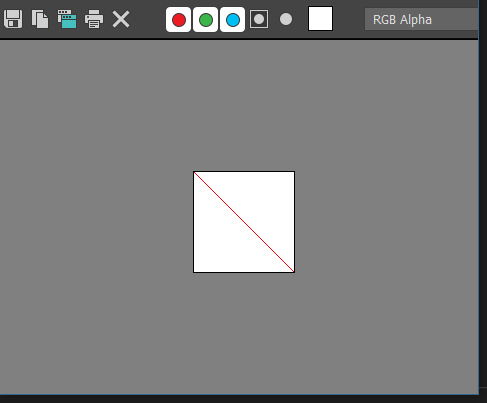
b=bitmap 100 100 color:white
for i=0 to 100 do
	(
		setPixels b [i,i] #(red)
	)

display b

b.filename=@"d:t.bmp"
save b

EXR格式输出
Epic顶点动画插件代码分析
法线
得到法线
fn getTheVertexNormal processObject vertexIndex = (
    normal = [0.0,0.0,0.0]
    if classof processObject.baseobject == Editable_Poly then (
            vertexPolygons = polyOp.getFacesUsingVert processObject vertexIndex
            for i in vertexPolygons do (
                    normal+=in coordsys world polyOp.getFaceNormal processObject i
                )
            ) else (
                normal= getNormal processObject vertexIndex
            )
            normal=normalize normal
            normal
        )
- 如果是可编辑多边形,得到一个顶点序号所有法线之和
- 否则就根据
getNormal方法直接去要
法线颜色
oldnormal=((((normalize (getTheVertexNormal currentMorphTarget j))*[1.0,-1.0,1.0])+1.0)*0.5)*255.0 --法线顶点色数据
- [-1,1]转换成[0,1]再乘以255得到颜色
顶点偏移
位置和颜色
--遍历模型所有顶点
for j=1 to numberofVerts do (
        oldnormal=((((normalize (getTheVertexNormal currentMorphTarget j))*[1.0,-1.0,1.0])+1.0)*0.5)*255.0
        append CurrentMorphTargetNormalArray oldnormal
        originalVertPos=originalMeshVertPositions[j]
        currentModelVertPos=getVertPos currentMorphTarget j  --得到顶点位置
        if (captureAbsolutePositions.checked)
            then (
                currentOffset=currentModelVertPos
            )
        else (
                currentOffset=(currentModelVertPos-originalVertPos)--如果不是绝对位置就要减去本地坐标来得到世界坐标
            )
            --反转Y轴
            currentOffset=[currentOffset[1],-1.0*currentOffset[2],currentOffset[3]]
            currentOffset*=255.0            --转成颜色
            append currentMorphVertexOffsetArray currentOffset
        )
--从系统方法得到顶点位置
fn getVertPos model index= (
    pos=[0,0,0]
    if classof model.baseobject == editable_poly then (
            pos=in coordsys world polyop.getVert model index
        ) else (
            pos=in coordsys world getVert model index
        )
        pos
    )
输出贴图
fn renderOutTheTextures = (
    fopenexr.SetCompression 0
    fopenexr.setLayerOutputType 0 1 -- set layer 0  main layer to RGBA, RGB = 1
    fopenexr.setLayerOutputFormat 0 1 --0 32 sets main layer to float 16 via 1. other options are 0 float 32, 2 int 32
    global TextureName = getSaveFileName types:"EXR (*.EXR)|*.EXR"
    if TextureName == undefined then (
            messagebox "please select a file location"
        )
    else(
            uvString="_UV"+((targetMorphUV-1) as string)
            TextureNameNormal= replace TextureName (findString TextureName ".EXR") 4 (uvString+"_Normals.BMP")
            TextureNameOffset= replace TextureName (findString TextureName ".EXR") 4 (uvString+".EXR")
            global FinalTexture = bitmap numberofVerts (MorphVertOffsetArray.count) filename:TextureNameOffset hdr:true; --创建EXR贴图
            global FinalMorphTexture = bitmap numberofVerts (MorphVertOffsetArray.count) filename:TextureNameNormal hdr:true  gamma:1.0 ;--创建法线贴图
            --遍历所有顶点数,设置像素颜色
            --2个颜色数组用UE4的语法表示是个数组  TArray<`TArray<FVector>`>
            --所以一个成员代表一行的所有颜色
            for i=0 to (MorphVertOffsetArray.count-1) do (
                    setPixels FinalTexture [0, i] MorphVertOffsetArray[(i+1)]
                    setPixels FinalMorphTexture [0, i] MorphNormalArray[(i+1)]
                )
                save FinalTexture gamma:1.0
                close FinalTexture

                save FinalMorphTexture gamma:1.0
                close FinalMorphTexture
            )
        )